Home / User Guide / Removing Duplicates from PC
Removing Duplicates from PC
1. Launch Duplicate Files Fixer
2.. Select Scan Computer under Scan Mode
![Select Scan Computer under Scan Mode](https://cdn.systweak.com/content/wp/dff/v2/userguide/romoving-dup-step1.webp)
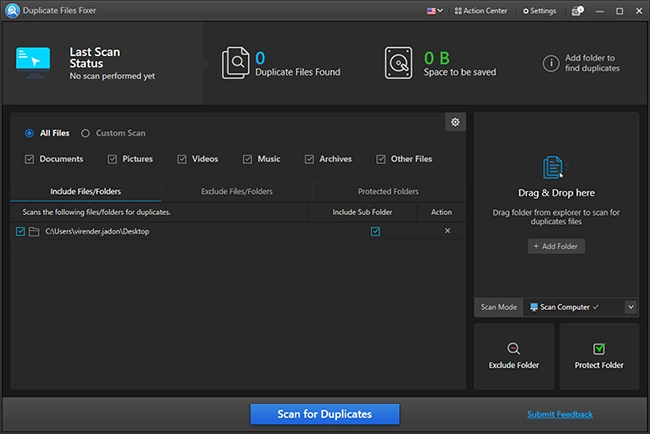
4. Drag and drop the folder to scan or click Add Folder.
5. Hit Scan for Duplicates to detect duplicates.
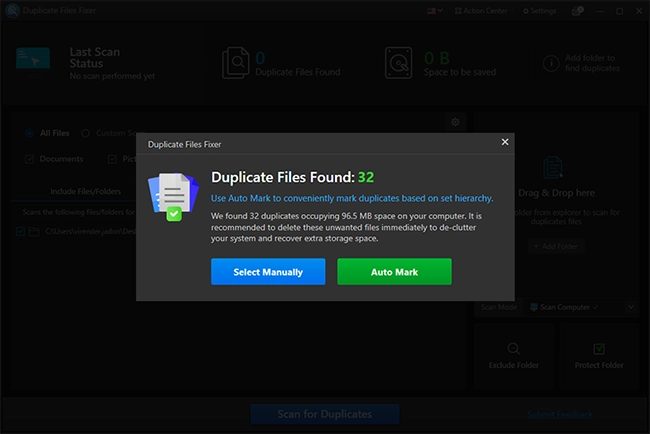
6. Wait for the scan to finish.
![Wait for the scan to finish](https://cdn.systweak.com/content/wp/dff/v2/userguide/romoving-dup-step2.webp)
7. Select duplicate using either option - Select Manually or Auto Mark. Preview files before deleting duplicates.
![Select Manually or Auto Mark](https://cdn.systweak.com/content/wp/dff/v2/userguide/romoving-dup-step3.webp)
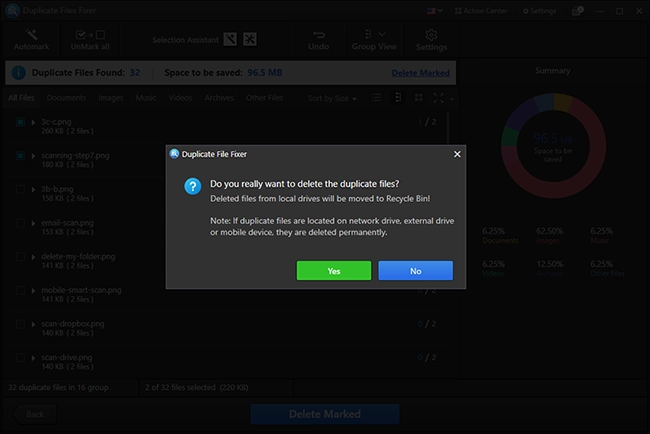
8. Click Delete Marked.
9. Confirm the action by clicking Yes.
![Confirm the action by clicking Yes](https://cdn.systweak.com/content/wp/dff/v2/userguide/romoving-dup-step4.webp)
12. Wait for the process to finish.
![Wait for the process to finish](https://cdn.systweak.com/content/wp/dff/v2/userguide/romoving-dup-step5.webp)
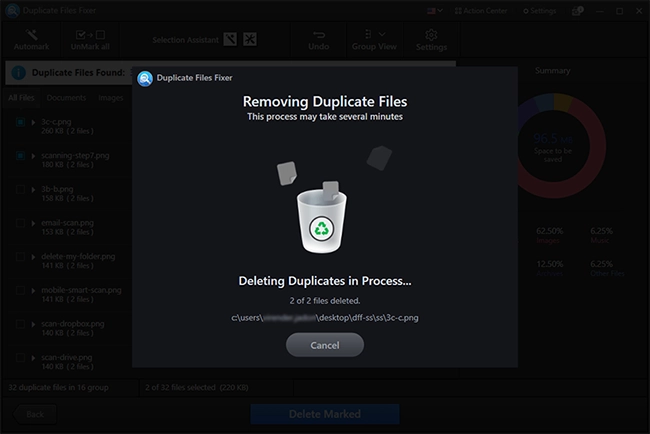
13. Once done, you will get a summary of the action performed.
![Will get a summary](https://cdn.systweak.com/content/wp/dff/v2/userguide/romoving-dup-step6.webp)
14. You can clean duplicates and reclaim storage space on your PC.